- VOX
- Compliance
- Enterprise Vault
- Enterpise Vault Certificate
- Subscribe to RSS Feed
- Mark Topic as New
- Mark Topic as Read
- Float this Topic for Current User
- Bookmark
- Subscribe
- Mute
- Printer Friendly Page
Enterpise Vault Certificate
- Mark as New
- Bookmark
- Subscribe
- Mute
- Subscribe to RSS Feed
- Permalink
- Report Inappropriate Content
04-15-2016 08:40 AM
Hi All,
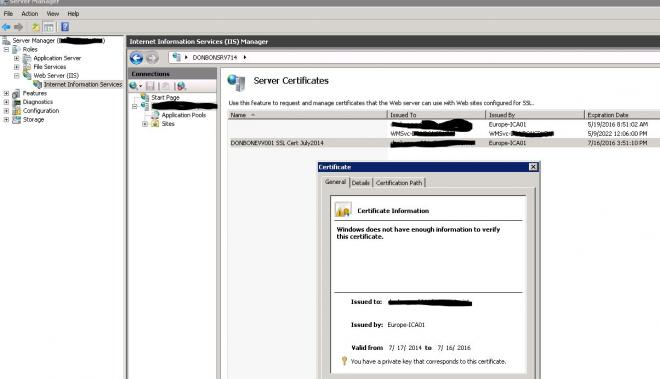
I am new in this of EV, currently we have an EV 9.0 running in windows server 2008 R2, I saw that every time that I need to connect to the EV using the Outlook add-in I need to accept a certificate to connect to the server and this allow the add-in connect to and work fine with the server. Yesterday I check the IIS in the EV and realized that the Certificate will expire soon, I want to know what are the implication when the certificate expire.
- Mark as New
- Bookmark
- Subscribe
- Mute
- Subscribe to RSS Feed
- Permalink
- Report Inappropriate Content
04-18-2016 12:01 PM
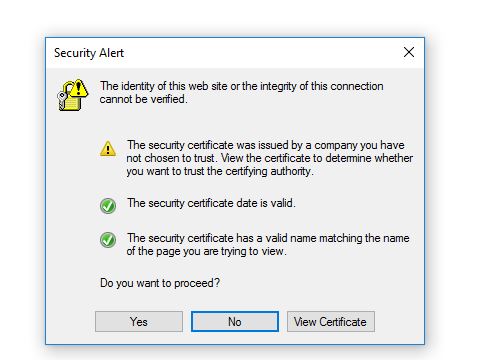
To get rid of security alert:
- In the Security Alert dialog box, click View Certificate.
- In the following View Certificate dialog box, click Install Certificate.
- In the Certificate Import Wizard, follow these steps:
- On the following Certificate Store wizard page, click Place all certificates in the following store, and then click Browse.
- In the following Certificate Store dialog box, click Trusted Root Certification Authority, and then click OK.
- On the Certificate Store wizard page, click Next.
- Click Finish to complete the wizard.
- Click Yes as the following screen shot shows when you are prompted to confirm the installation of the certificate.
- Click OK when you are advised that the import was successful.
- Click OK to close the View Certificate dialog box.
- Click Yes in the Security Alert dialog box to continue to start Outlook.
- Exit and restart Outlook.
Now, you do not receive the security warning when you start Outlook.
After you install the certificate by using this procedure, you can confirm that the certificate is installed correctly on the client. To do this, follow these steps:
- Start Windows Internet Explorer.
- On the Tools menu, click Internet Options.
- On the Content tab, click Certificates.
- In the Certificates dialog box, click the Trusted Root Certification Authorities tab.
- Scroll down the list of installed certificates to locate the certificate for your server. (The screen shot for this step is listed below).
Note In the following scenario where you are using a self-signed certificate on your Exchange 2010 server, Outlook does not display the Security Alertdialog box if both of the following conditions are true:
- The certificate is listed.
- The date in the Expiration Date column has not been reached.
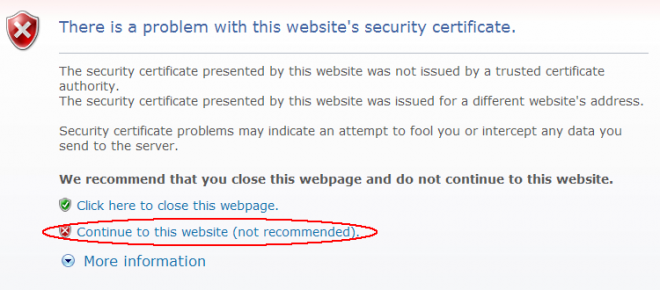
**** Once the certificate is expired, users start seeing below:
So, please renew the SSL certificate before it expires
- sharepoint archiving requirement in Enterprise Vault
- Vault Administration Console when open "Indexing" get warning about Certificate in Enterprise Vault
- Archive Task Failure in Enterprise Vault
- Change EV namespace in Enterprise Vault
- EV12.3 SMTP 45824 Only one usage of each socket address (protocol/network address/port) is normally in Enterprise Vault
