Netbackup plugin for VMWare
Introduction
One of the options that come with Netbackup is a plugin for integration with Virtual Center. VMware administrators can view the status of backups of their environment without having to access the Netbackup console. So far the process for them is simplified: Besides seeing the existing backups they can also know which machines have no backup, information very important as virtual machines "grow" very quickly and not always reported to the department backup.
In addition to allowing monitoring, you can restore backups (including instant restorations). Thus, VMWare administrators have greater autonomy in the tasks they can perform.
Installation
We need to download the corresponding package from my.veritas.com. Inside the package is the zip for vSphere Web client (called netbackup-vwc-plugin.zip) that needs to be copied to a web server so that we can access it from a browser (for example, copy it to the C:\ProgramData\VMware\VMware VirtualCenter\docRoot\netbackup in the vcenter server).
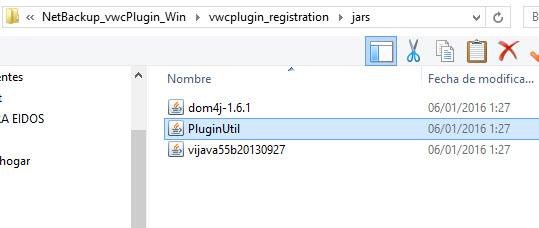
From the machine where you will install it, run the PluginUtil file that is within the vwcplugin_registration/jars directory:
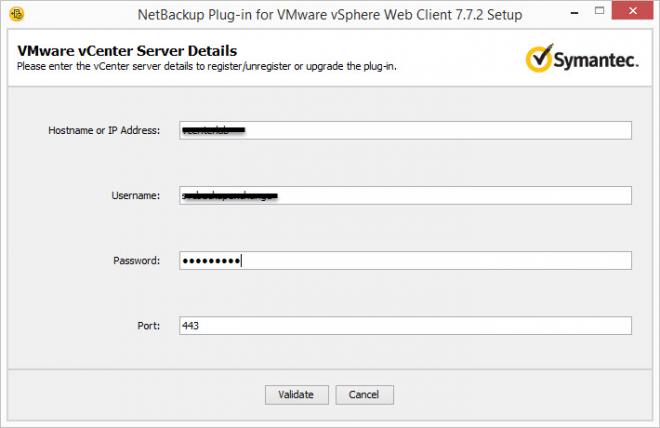
After that, we need to fill in the information for our virtual center:
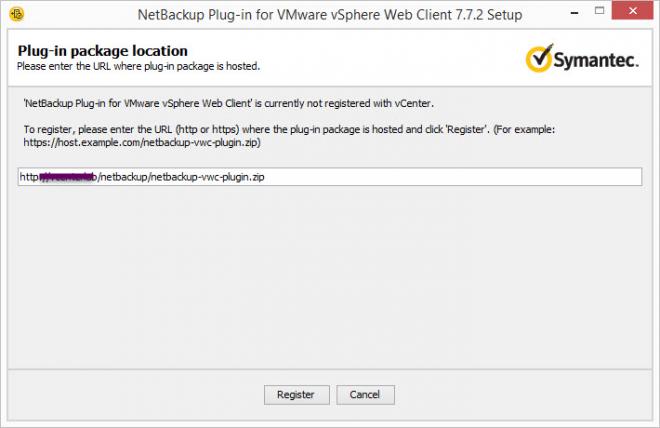
and finally the path on which we have copied the zip that has to be accessible by a URL:
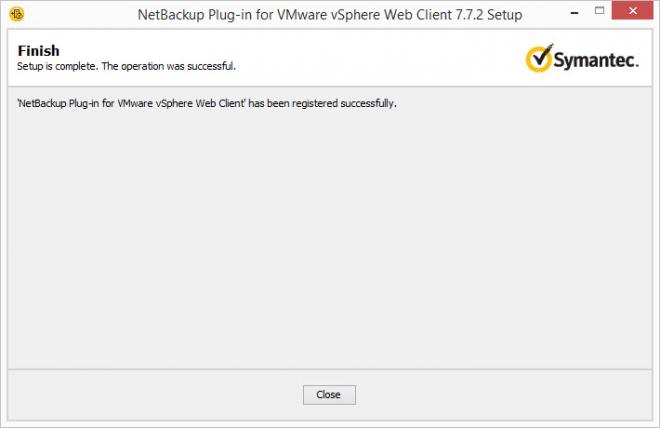
if everyfing is fine it will be installed correctly:
From here, we can have information on our Web client vSphere about backups of the vms:
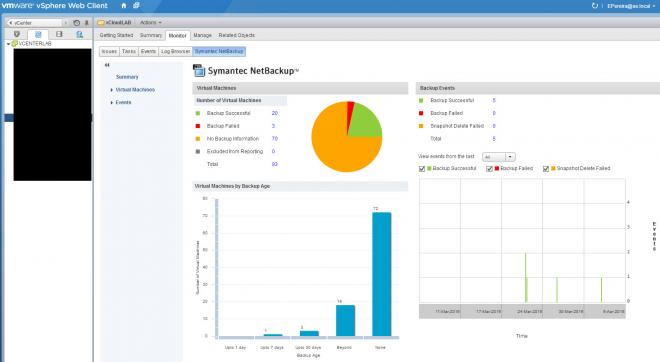
This information will allow us to check the status of our backups. You can see what machines have no copies, the ones that are giving errors, and even how old are the backups we have. From this screen you can navigate to see more details. For example, if you click on the machines where backups have failed we get more information:

So far we have seen reporting functionality. To have all the features offered by the plugin regarding restorations we need to activate the web services on our master server.
First, we must create a "nbwebgrp" and a user group "nbwebsvc" in our master server and give permission "Logon as a Service". Then, to configure Web services need to run the following command:
C: \ Program Files \ VERITAS \ NetBackup \ wmc \ bin \ install> setupWmc.bat -password <passwod>
Started 'NetBackup Web Management Console' service on Master Server 'EPEREIRA-NBU01' port '8443'.
Now we can check whether web services have started accessing the url https well: // localhost: 8443 / nbwebservice / application.wad1
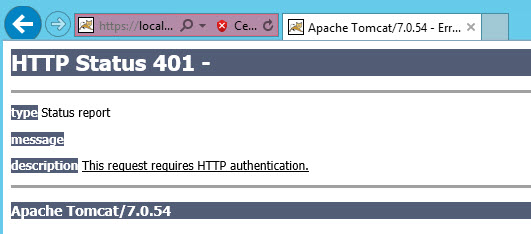
if it has been installed correclty, we should get a 401 error indicating that requires authentication. To finish setting up the master, we have to create an authentication token with the following command:
C: \ Program Files \ VERITAS \ NetBackup \ wmc \ bin \ install> manageClientCerts.bat -create vcenterlab
Successfully created client certificate for 'vcenterlab' to secure access to the Web Services on NetBackup Master Server 'EPEREIRA-NBU01' port '8443'.
Please find the zip at C: \ Program Files \ Veritas \ NetBackup \ var \ Global \ WSL \ credentials \ clients \ vcenterlab.zip.
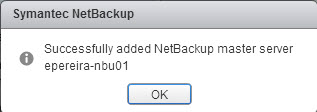
Then from the web client we can configure our master server with the "Register Master Servers" option:

fill in the appropriate information to our master server and choose as "Authentication Token" the .zip file that we generated in the master server:

If there is no problem we will get confirmation:
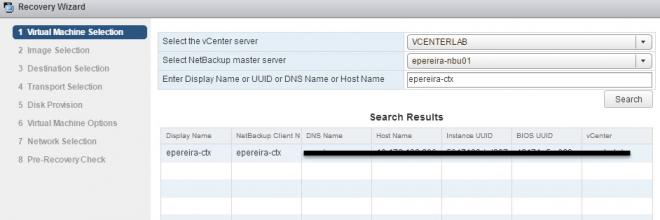
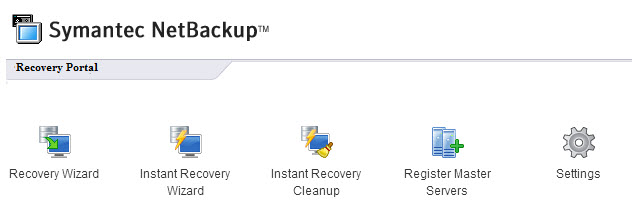
Now we can do restorations from the virtual center (including instant restore in which the virtual machine is started in a few minutes as the media server is able present a NFS datastore with the vmdk directly from the backup). You can restore the machine from the Symantec Netbackup tab or from the context menu of any virtual machine:
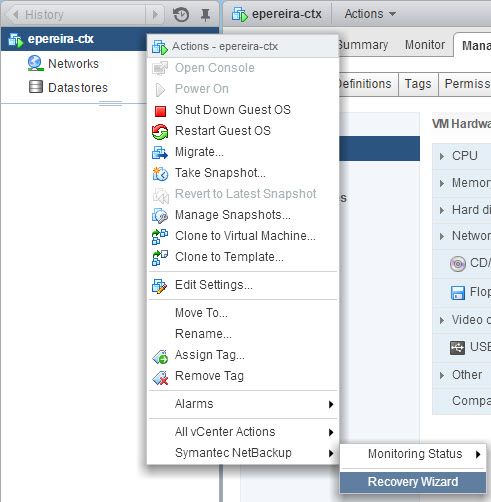
The Restore Wizard will start:
The screens showed are similar to those of the restoration from the Netbackup console, such as:
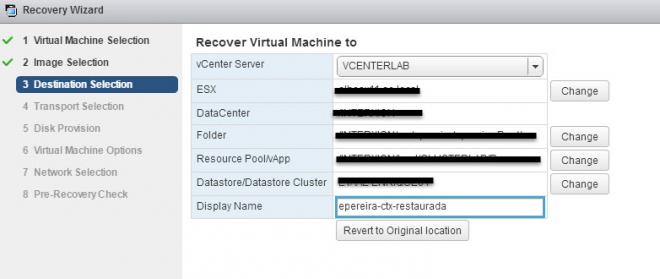
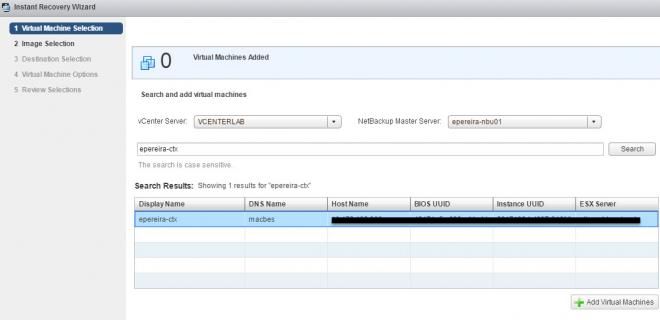
Thus, you can restore virtual machines from the vCenter client without administrator intervention of Netbackup administrators. It is also possible to make an instant restore from the web interface. First select the machines you want to restore:
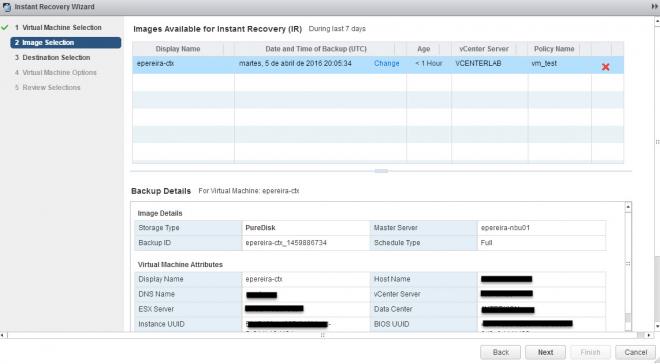
Then choose the image date:
And the destination for restoration:
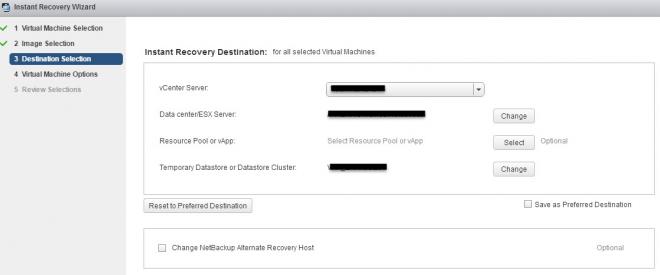
This will make instant restore. When we finish we have the option to end it with the "Instant Recovery Cleanup" option.
References
NetBackup 7.7.2 Plug-in for VMware vCenter Web Client Guide
Translated from Spanish from my Spanish Netbackup Blog:
https://netbackupguru.es/netbackup-plugin-vmware-web-client/