- VOX
- VOX Knowledge Base
- Data Protection Knowledge Base
- Articles
- Netbackup 7.5 for Oracle 11g on linux
- Subscribe to RSS Feed
- Mark as New
- Mark as Read
- Bookmark
- Subscribe
- Printer Friendly Page
- Report Inappropriate Content
- Subscribe to RSS Feed
- Mark as New
- Mark as Read
- Bookmark
- Subscribe
- Printer Friendly Page
- Report Inappropriate Content
on 10-12-2013 05:51 AM
Netbackup 7.5 for Oracle 11g
Environment:
Netbackup Master / Media Server:
Windows server 2008 R2
NetBackup 7.5 for windows
Oracle 11g Server:
Enterprise Red Hat Linux 5 x86_64
Oracle 11g 11.2
Oracle DB “DB11G”
Note:
Pass host entries on both server and client to resolve IP to their hostnames.
Windows: c:\windows\system32\drivers\etc\hosts
Linux: /etc/hosts
Linking Netbackup with RMAN:
· Login as Oracle user with “su – user”
· Verify oracle home: echo $ORACLE_HOME
· Verify oracle SID: echo $ORACLE_SID
· Shutdown oracle instances:
o #sqlplus “/as sysdba”
o SQL> shutdown normal
o SQL> Exit
· Link Netbackup with RMAN
o Automatic:
§ Run the oracle_link script that is located in /usr/openv/netbackup/bin/.
§ This script determines the Oracle version level and then links Oracle withthe NetBackup API library. This script writes output to/tmp/make_trace.<pid>. To change the trace file location, change theMAKE_TRACE variable in the oracle_link script.
o Manual Linking:
§ Type the following cd(1) command to change directories:
cd $ORACLE_HOME/lib
§ Type the following ls(1) command to determine whether the Oracle library exists:
ls -l libobk.so
§ Use the mv(1) command to move the Oracle library to an alternate location. Perform this step if the output from step 2 shows that libobk.so is present.
For example:
mv libobk.so libobk.so.orig
§ Type the following ln(1) command to create a new link:
ln -s /usr/openv/netbackup/bin/libobk.so64 libobk.so
· Mount Database now.
o #sqlplus “/as sysdba”
o SQL> startup mount
o SQL> exit
· Check and start oracle listener
o #lsncrtl status
o #lsncrtl start
· Database must be in archived log mode for online backups
o #sqlplus “/as sysdba”
o SQL> archive log list;
o SQL>alter database open;
Permission and logs:
· Create Log folder on master server:
Windows: c:\program files\veritas\netbackup\logs
Linux: /usr/openv/netbackup/logs
“Bprp, bpdbm, bpbrm, bptm”
· Create Log folders on Oracle Server (NBU Client), we are discussing linux based oracle server so…..
Linux: /usr/open/netbackup/logs
“bpdbsbora, bporaexp (or boraexp64), bporaimp (or boraimp64), bpubsora, dbclient, bphdb, and bpcd.
· Permissions:
All log folders must have read and write full rights.
#chmod –R 777 /usr/openv/netbackup/logs
Create Backup Template from NetBacup BAR.
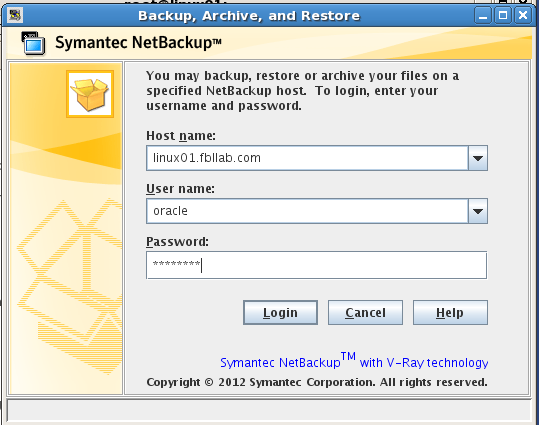
Linux: /usr/openv/java/jbpSA &
Provide credentials to login NBU Client Java BAR Console.
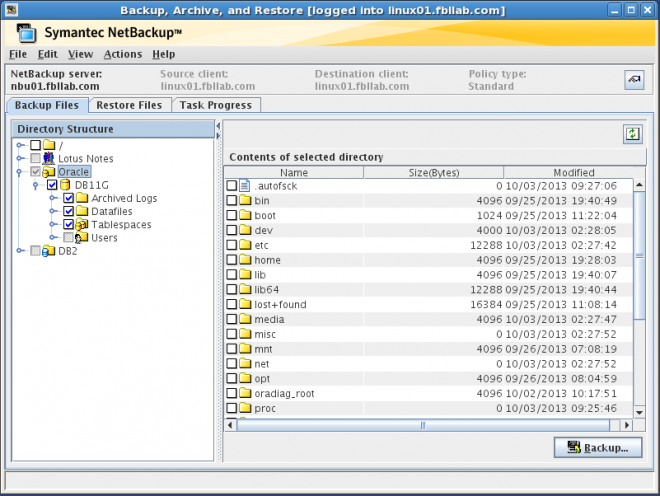
Select Database “DB11G” and Click Backup button:
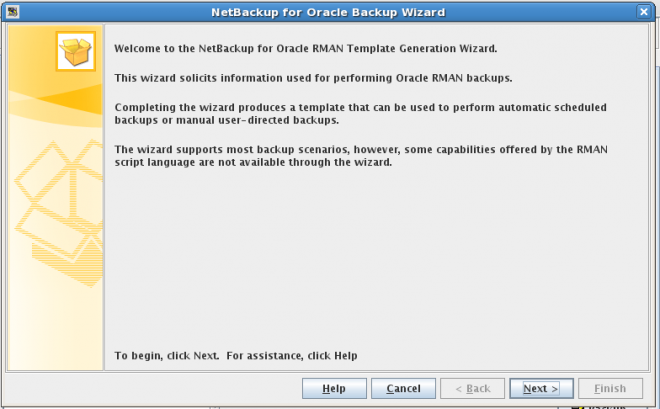
Click “NEXT”
Provide logon details for ORACLE

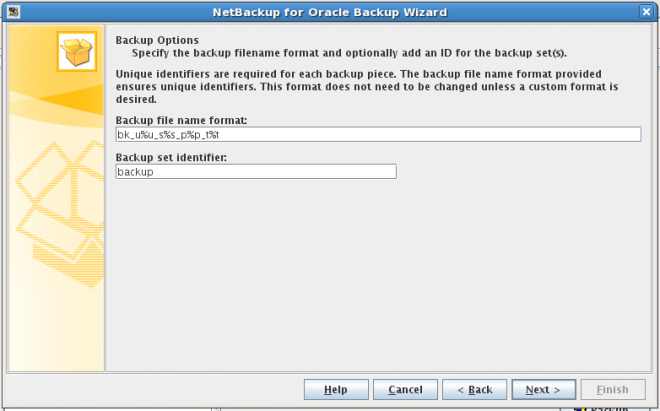
Select next or modify as per requirements.
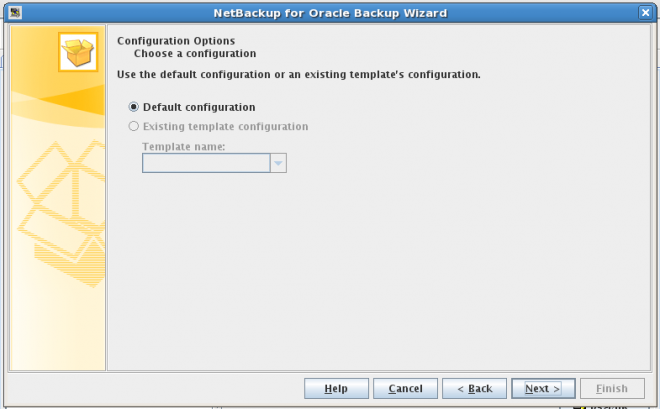
We are going to configure first Tamplete so need to select “Default Configuration” and click Next
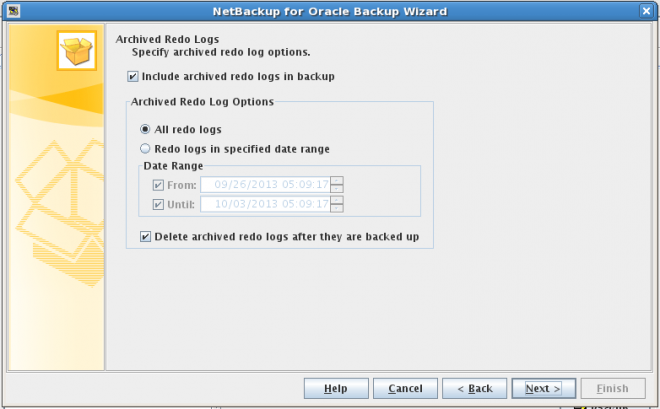
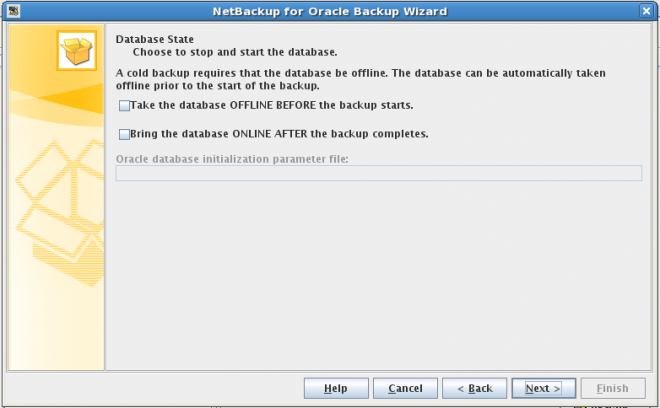
For Online backups uncheck both options
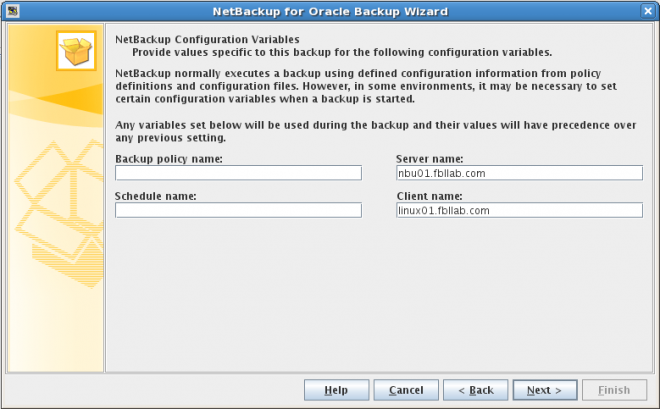
Must write Name of Client <oracle server> and Netbackup Master server
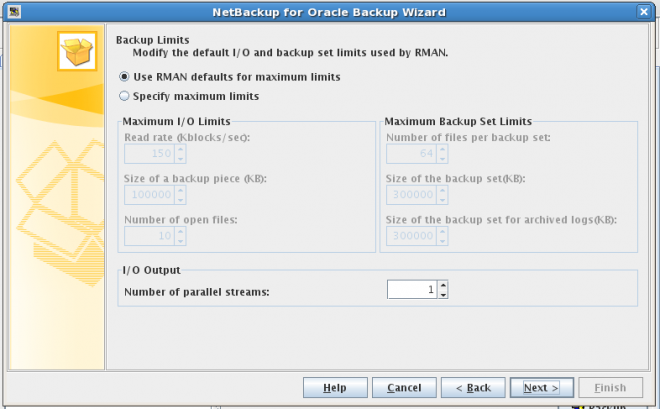
I/O Limits as per requirement and environment
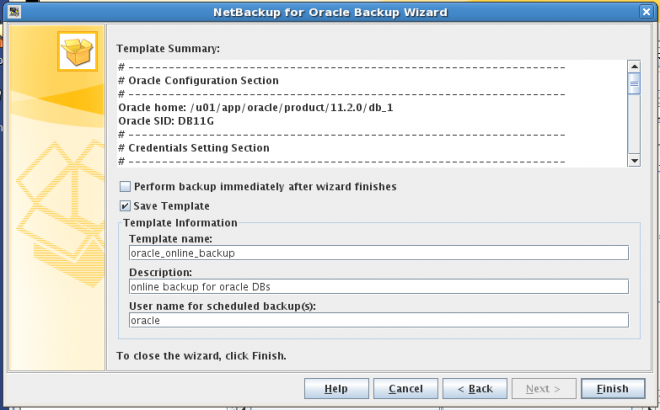
Check the box “Save Template” name the template, description, owner that can be root to and click “Finish” button
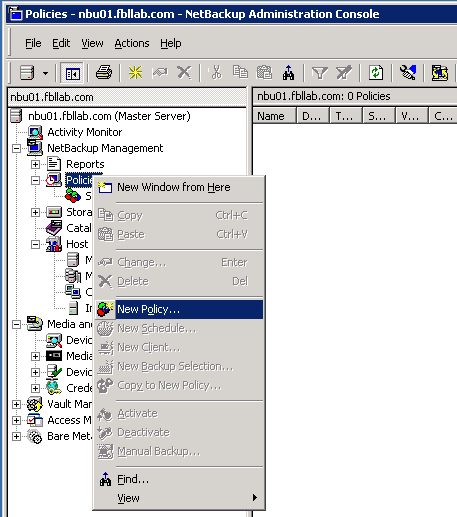
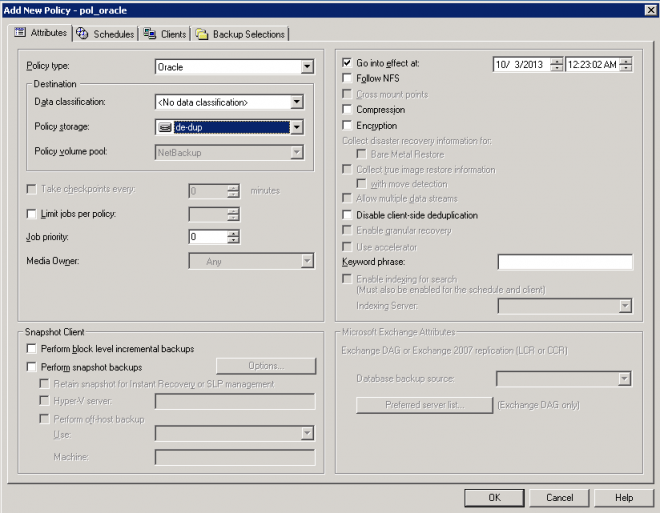
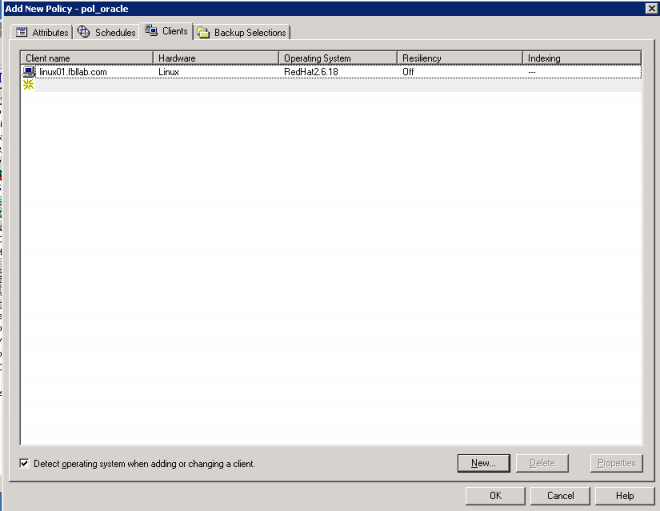
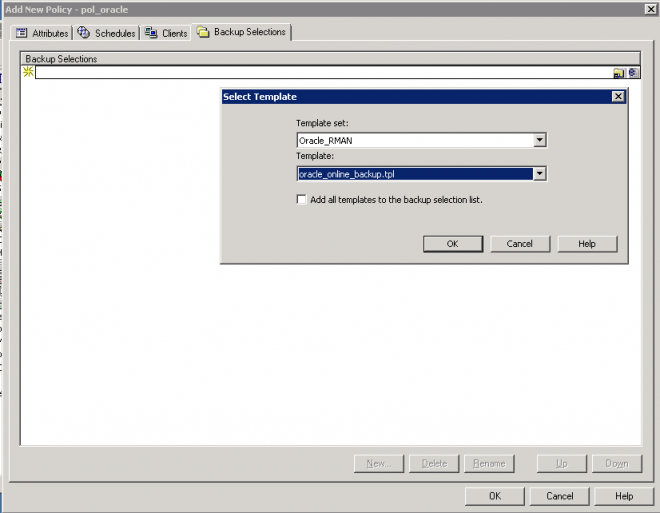
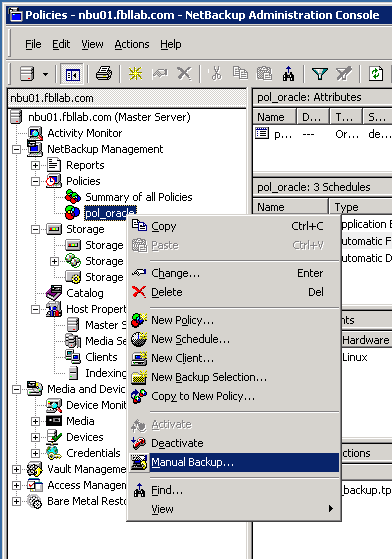
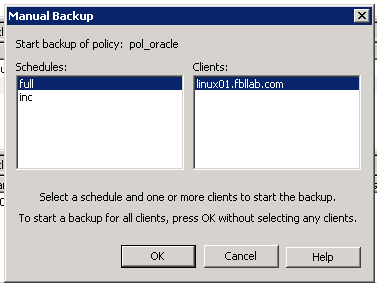
Create New Policy with Policy type “Oracle” using created template as shown in below snapshots.
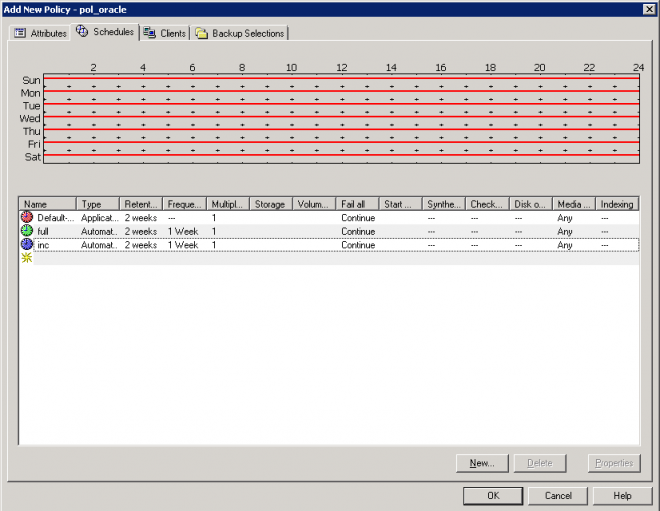
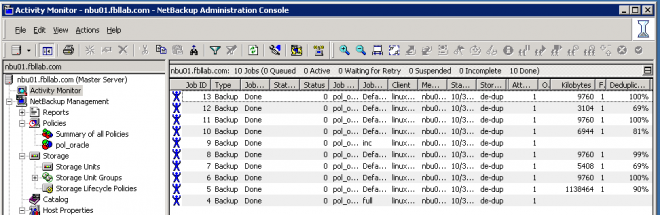
Run the policy for take backup manually.
Restoration of ORACLE DB
Start the DB in no-mount state.
#sqlplus “/as sysdba”
SQL> shutdown immediate
SQL> startup nomount;
SQL> Exit
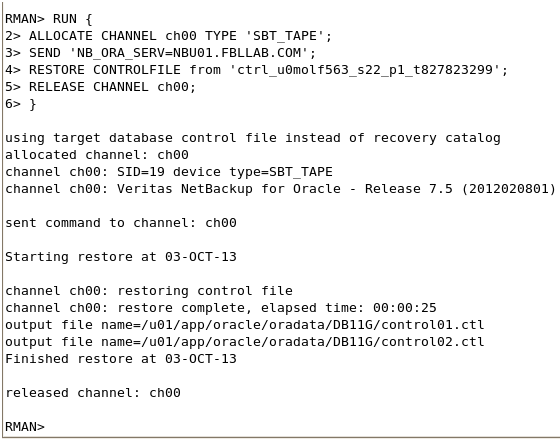
Restore Control file for Point in time recovery.
On Master Server: c:\program file\vertis\netbackup\bin\
Bplist –C linux01.fbllab.com –t 4 –R /
OUTPUT:
ctrl_u0molf563_s22_p1_t827823299:\
arch_u0lolf54m_s21_p1_t827823254:\
bk_u0kolf535_s20_p1_t827823205:\
bk_u0jolf4th_s19_p1_t827823025:\
ctrl_u0iolf1rp_s18_p1_t827819897:\
arch_u0holf1qa_s17_p1_t827819850:\
bk_u0golf1oo_s16_p1_t827819800:\
bk_u0folf1i9_s15_p1_t827819593:\
bk_u0eolf1bn_s14_p1_t827819383:\
bk_u0dolf15s_s13_p1_t827819196:\
Connect to RMAN for restoration:
#RMAN target /
Mount the database, then start NBU BAR wizard to restore database.
#sqlplus “/as sysdba”
SQL> startup mount
SQL> Exit
Launch NBU Backup, Archive & Restore Wizard:
#./usr/openv/java/jbpSA &
Select backup to restore from restore tab in NBU Java BAR console. Click “restore”

Select “next”

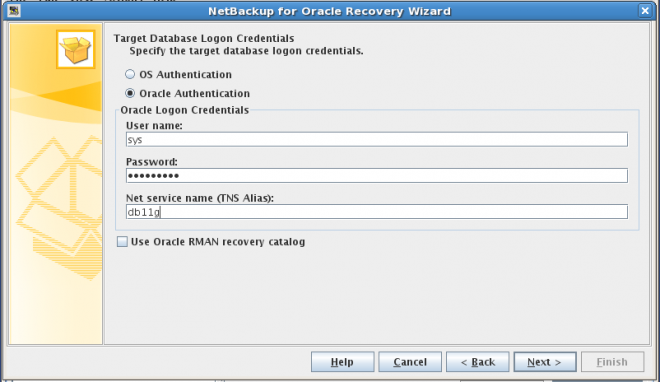
Provide oracle credentials:
Click “Next” with default setting make changes if required.

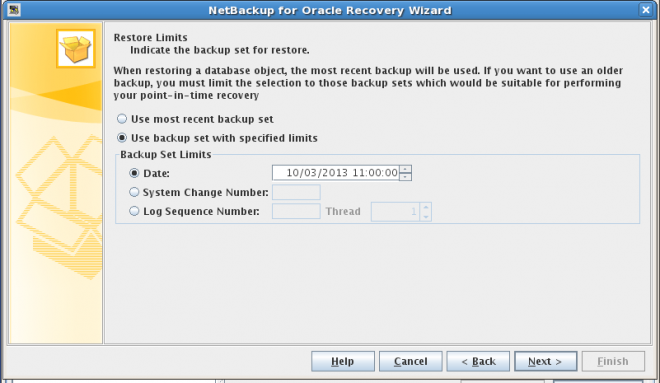
Restore limits for point in time recovery click “next”
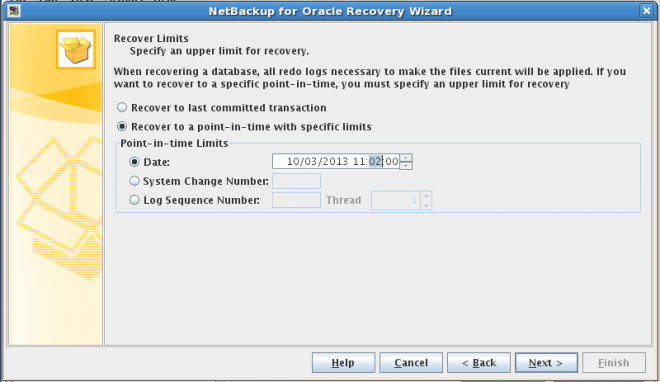
Point in time recovery options click “Next”
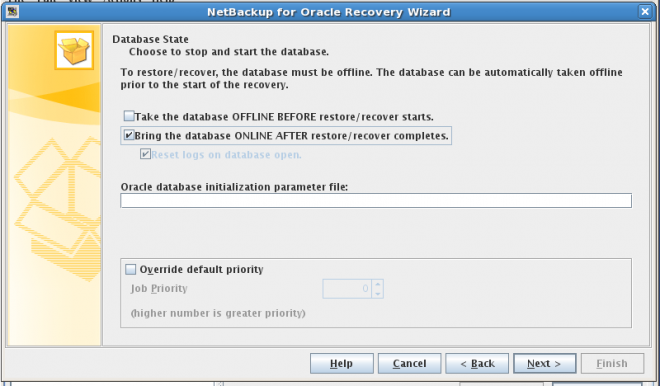
Check as below snapshot and click “Next”
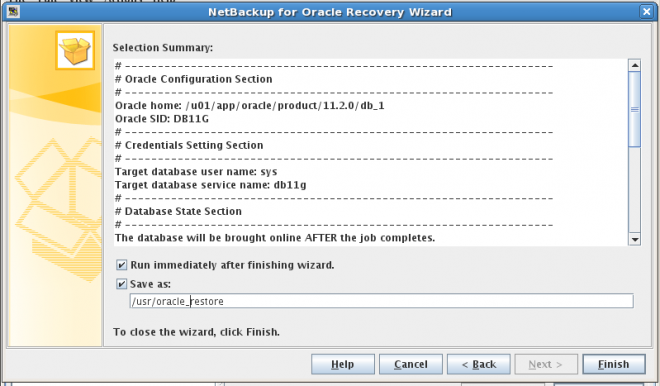
Restore selection summary page go through the summary and click “Finish” to start restore.
Go to task tab to view status of restore job.

Hope this aricle may help some to create backup and restoration jobs for Oracle 11g on Linux
- Mark as Read
- Mark as New
- Bookmark
- Permalink
- Report Inappropriate Content
Nice one :)
- Mark as Read
- Mark as New
- Bookmark
- Permalink
- Report Inappropriate Content
Failed at Step "Select Template". The template didn't show in Template Set: Oracle_RMAN but resolved after close and reopen Netbackup Administration Console
Then OK with restoring.
Many thx